
2018年8月,IETF阻止宣布了TLS1.3,相比tls1.2,tls大大加强了安全特性,启用了很多过时的加密算法,在软件生态方面,浏览器客户端,目前的最新版的firefox和chrome均已支持,但在服务端上,大部分发行版的软件仓库还不支持(rhel8和即将发布的debian 10会原生支持),需要我们手动编译相关软件才行。
先编译安装openssl
我们的Linux发行版选用CentOS 7.6,系统自带的openssl版本为1.0.2k,很遗憾不支持tls 1.3,由于很多系统自带软件对openssl有依赖,不能轻易删除或改变,所以我们将手动编译openssl 1.1.1c,并且安装在非标准目录。
tar xf openssl-1.1.1c.tar.gz
cd openssl-1.1.1c/
yum install gcc zlib-devel #安装下依赖
./config --prefix=/opt/openssl -Wl,-rpath=/opt/openssl/lib --openssldir=/usr/local/ssl shared zlib-dynamic
make && make install
下面导入下环境变量,方便后面编译nginx用。
export PATH=/opt/openssl/bin:$PATH #导入环境变量
openssl version #查看下版本
openssl ciphers -V | column -t #查看支持的加密算法套件
下面开始编译安装nginx
先下载并安装依赖
curl -O https://nginx.org/download/nginx-1.16.0.tar.gz
yum install gcc-c++ pcre-devel gperftools-devel gd-devel libxml2-devel libxslt-devel perl-ExtUtils-Embed GeoIP-devel
tar xf nginx-1.16.0.tar.gz
cd nginx-1.16.0/
configure一下:
./configure --prefix=/usr/share/nginx --sbin-path=/usr/sbin/nginx \
--modules-path=/usr/lib64/nginx/modules --conf-path=/etc/nginx/nginx.conf \
--error-log-path=/var/log/nginx/error.log --http-log-path=/var/log/nginx/access.log \
--http-client-body-temp-path=/var/lib/nginx/tmp/client_body --http-proxy-temp-path=/var/lib/nginx/tmp/proxy \
--http-fastcgi-temp-path=/var/lib/nginx/tmp/fastcgi --http-uwsgi-temp-path=/var/lib/nginx/tmp/uwsgi \
--http-scgi-temp-path=/var/lib/nginx/tmp/scgi --pid-path=/run/nginx.pid --lock-path=/run/lock/subsys/nginx \
--user=nginx --group=nginx --with-file-aio --with-http_ssl_module --with-http_v2_module \
--with-openssl=../openssl-1.1.1c --with-http_realip_module --with-http_addition_module --with-http_xslt_module=dynamic \
--with-http_image_filter_module=dynamic --with-http_geoip_module=dynamic --with-http_sub_module \
--with-http_dav_module --with-http_flv_module --with-http_mp4_module --with-http_gunzip_module \
--with-http_gzip_static_module --with-http_random_index_module --with-http_secure_link_module \
--with-http_degradation_module --with-http_slice_module --with-http_stub_status_module \
--with-http_perl_module=dynamic --with-mail=dynamic --with-mail_ssl_module --with-pcre \
--with-pcre-jit --with-stream=dynamic --with-stream_ssl_module --with-google_perftools_module
编译并安装:
make && make install
配置nginx
加载nginx的模块
mkdir /usr/share/nginx/modules
cd /usr/share/nginx/modules
cat all.conf
load_module "/usr/lib64/nginx/modules/ngx_http_geoip_module.so";
load_module "/usr/lib64/nginx/modules/ngx_http_image_filter_module.so";
load_module "/usr/lib64/nginx/modules/ngx_http_perl_module.so";
load_module "/usr/lib64/nginx/modules/ngx_http_xslt_filter_module.so";
load_module "/usr/lib64/nginx/modules/ngx_mail_module.so";
load_module "/usr/lib64/nginx/modules/ngx_stream_module.so";
systemd配置:
cat /usr/lib/systemd/system/nginx.service
[Unit]
Description=The nginx HTTP and reverse proxy server
After=network.target remote-fs.target nss-lookup.target

[Service]
Type=forking
PIDFile=/run/nginx.pid
ExecStartPre=/usr/bin/rm -f /run/nginx.pid
ExecStartPre=/usr/sbin/nginx -t
ExecStart=/usr/sbin/nginx
ExecReload=/bin/kill -s HUP $MAINPID
KillSignal=SIGQUIT
TimeoutStopSec=5
KillMode=process
PrivateTmp=true

[Install]
WantedBy=multi-user.target
建立一些临时目录:
mkdir -p /var/lib/nginx/tmp
cd /var/lib/
chown -R nobody. nginx/
nginx的主配置文件:
cat /etc/nginx/nginx.conf
user nobody;
worker_processes auto;
error_log /var/log/nginx/error.log;
pid /run/nginx.pid;

include /usr/share/nginx/modules/*.conf;

events {
    worker_connections 1024;
}

http {
    include mime.types;
    default_type application/octet-stream;

    log_format main '$remote_addr - $remote_user [$time_local] "$request" '
                    '$status $body_bytes_sent "$http_referer" '
                    '"$http_user_agent" "$http_x_forwarded_for"';

    access_log /var/log/nginx/access.log main;

    sendfile on;
    tcp_nopush on;
    keepalive_timeout 65;

    include /etc/nginx/conf.d/*.conf;
}
配置下虚拟主机:
cat /etc/nginx/conf.d/yyshell.conf
server {
    listen 443 ssl http2;
    listen [::]:443 ssl http2;
    server_name wiki.yyshell.com;
    root /var/www/yyshell;

    ssl_certificate "/etc/pki/tls/certs/fullchain.pem";
    ssl_certificate_key "/etc/pki/tls/private/privkey.pem";
    ssl_session_cache shared:SSL:10m;
    ssl_session_timeout 10m;
    ssl_ciphers "EECDH+AESGCM:EDH+AESGCM:AES256+EECDH:AES256+EDH";
    ssl_prefer_server_ciphers on;
    ssl_protocols TLSv1.2 TLSv1.3;

    location / {
    }

    error_page 404 /404.html;
    location = /40x.html {
    }

    error_page 500 502 503 504 /50x.html;
    location = /50x.html {
    }
}
然后我们在对应的目录,放一个index.html文件,方便测试。用firefox打开测试网站https://wiki.yyshell.com ,看下加密连接的属性:
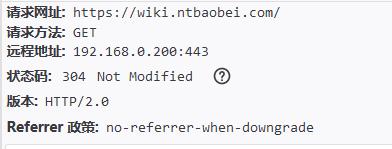
 分析下具体的网络请求,可以发现http2也启用了。
查看下运行的进程:
ps -ef | grep nginx
root 35494 1 0 11:21 ? 00:00:00 nginx: master process /usr/sbin/nginx
nobody 35495 35494 0 11:21 ? 00:00:00 nginx: worker process
nobody 35496 35494 0 11:21 ? 00:00:00 nginx: worker process
nobody 35497 35494 0 11:21 ? 00:00:00 nginx: worker process
nobody 35498 35494 0 11:21 ? 00:00:00 nginx: worker process
可以看到我们是以nobody用户运行的,这点和配置文件上一样。
如何为网站启用http2及tls 1.3